Create Inventory Lists
For many organizations, one of the keys to successful inventories is a printed worksheet that can be distributed to staff and volunteers. The first step in creating these worksheets is to define the collections to be checked. Inventory Manager enables you to build randomly sampled or complete lists from your PastPerfect catalogs.
Create Inventory Sampling Lists
You can easily build an inventory list based on a number of criteria. From the Main Menu, click Inventory Manager. Click Create Inventory List to see the screen below.
Create Inventory Sampling List screen
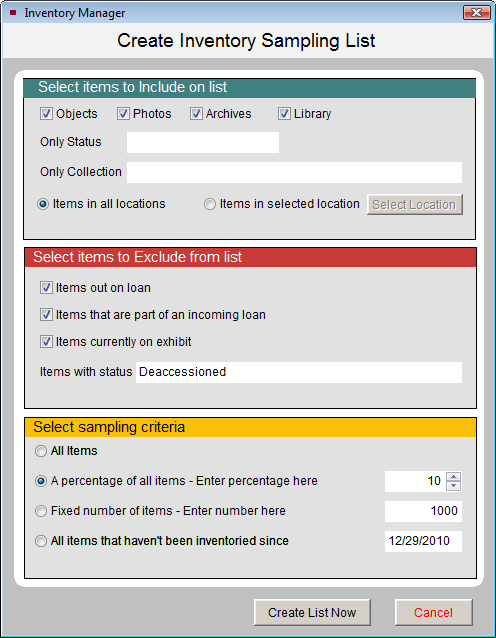
The first section of the Create Inventory Sampling List screen allows you to choose which catalogs your inventory list is based on. Removing the check marks will exclude those catalog items from your inventory. You can further narrow the scope of your inventory by selecting a single location, collection, or status.
The Select items to Exclude from list section allows you to exclude items that are currently part of an outgoing loan, incoming loan, or are on exhibit. Removing the check marks from this section will allow these items to be part of your inventory. By filling out the Items with status field, users can exclude items from their inventory. For example, an organization who uses Status to record deaccessioned records may want to exclude those records from the inventory, as shown.
The Select sampling criteria section allows you to determine the number of records that will be included on your inventory list. If you have narrowed the list down to a single location in the first section, you may want to select All Items in this section. The other options in this section allow you to reduce the number of items that are selected for your inventory.
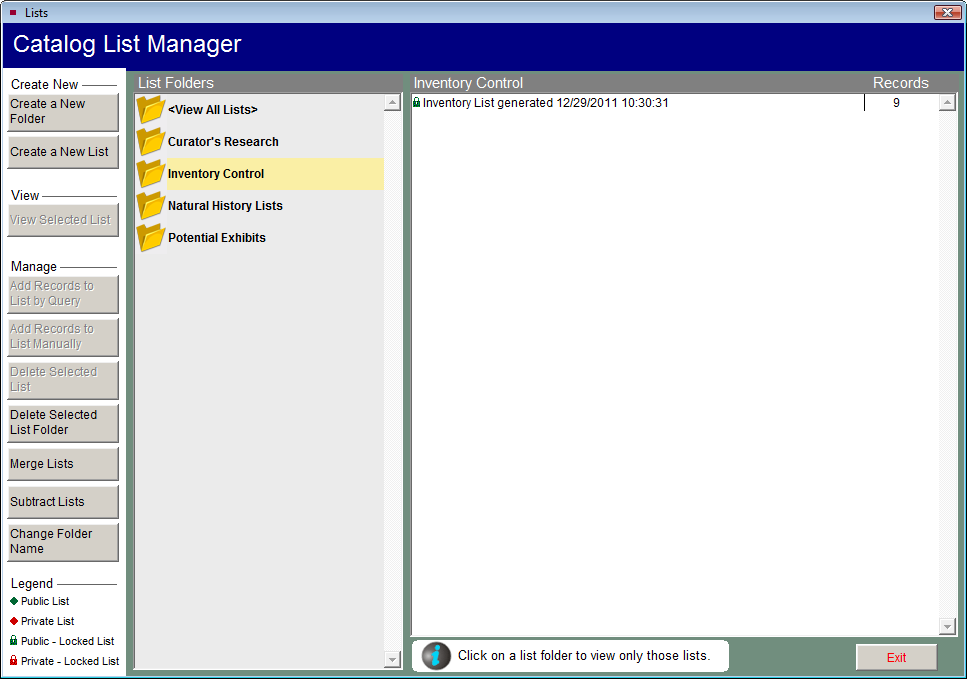
The settings shown above will randomly select ten percent of the records across all four catalogs, but will not include items on loan, items on exhibit, or items with the status of "Deaccessioned." Clicking the Create List Now button will add items to a list and open the screen below.
Catalog List Manager screen with Inventory Control folder
Print Inventory Worksheets
Once you have created an inventory list, it is automatically added to the Inventory Control folder in Catalog Lists. To print an inventory worksheet, on the Catalog List screen select the list from the column on the right, then click View Selected List. At the bottom of the Sidebar, click Print Inventory Worksheet. You have a choice of worksheets to use. The Inventory Check List is the most basic report and displays about 32 records per page. It contains the fields Object ID and Object Name. The Inventory Check List with Images adds a few fields including Status and Location, as well as a thumbnail image of each item. The Inventory Full Worksheet contains more fields and may only show a record or two per page. As with all reports in PastPerfect, these worksheets may be modified to meet your needs. Please see Chapter 19 - Advanced Report Modifications for detailed instructions on modifying reports.