Creating "Quick Search" Links on your Landing Page
Concept
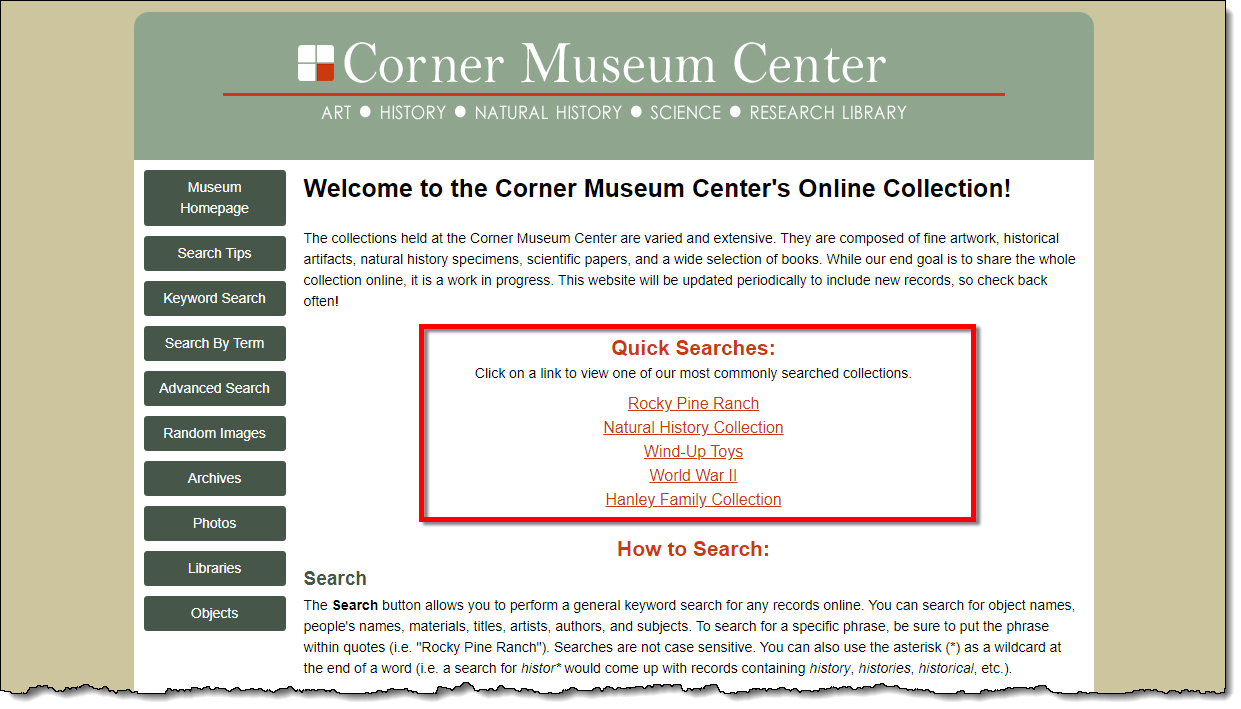
In addition to providing search tips for your visitors on your Landing
Page, you can also list Quick Search links to help visitors find commonly
searched for items in your collection. To view how these Quick Search
links work, please visit our demonstration site, Corner
Museum Center and click on any of the options under "Quick Searches".
The links on this demonstration site go to the results page for a specific
search in order to show multiple records relating to a certain topic;
you can also make your links go directly to a particular catalog record
to highlight a specific item.
The PastPerfect Online team is also happy to set up Quick Search links
for you. We can also create more complex links with images. Please email
pposupport@museumsoftware.com
if interested.
This topic will discuss how to create Quick Search links similar to
those you see at the Corner Museum Center demonstration site. Before following
these steps please be sure to have created and uploaded data and images
to your site.
Task
- Sign into https://admin.pastperfectonline.com.
- Select the Landing Page tab.
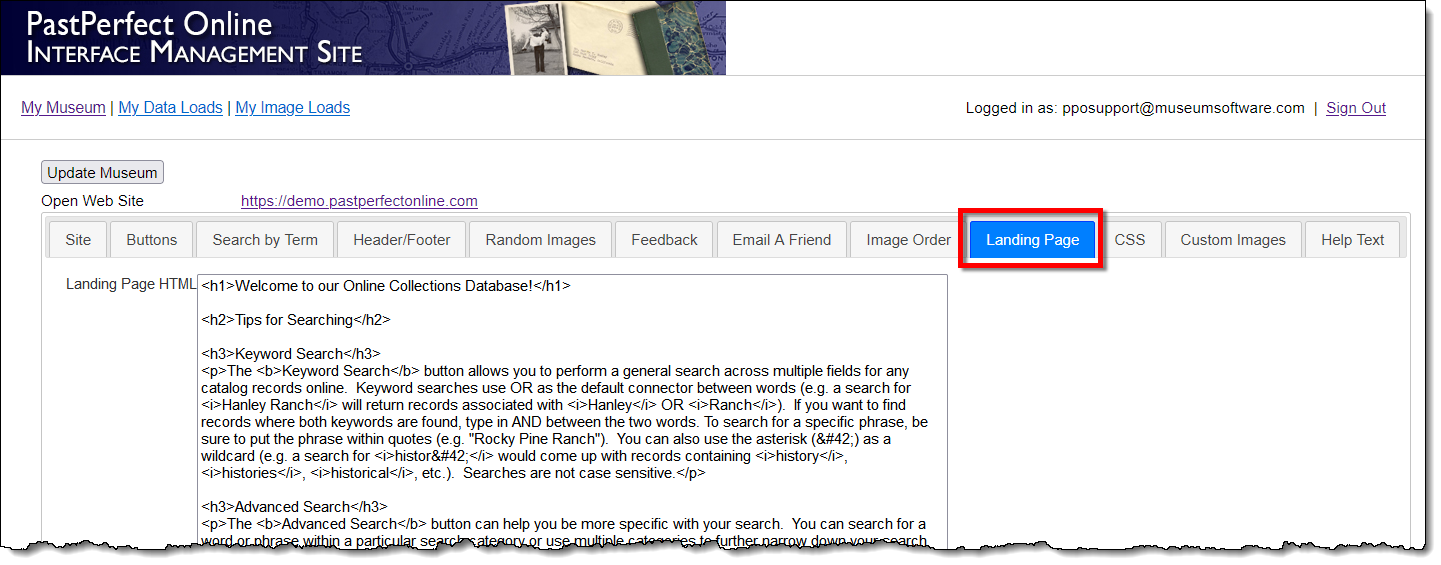
- Locate where in the HTML you would like your Quick Search links
to appear.
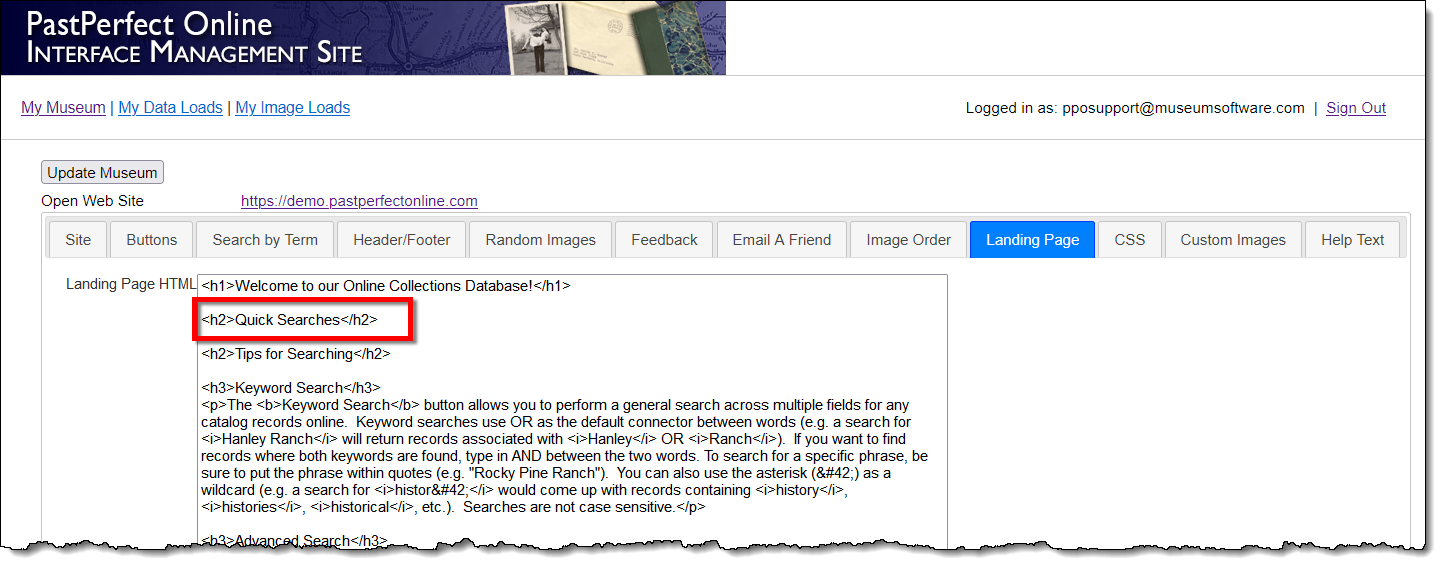
- If you want to add a header for these Quick Search Links, type
in: <h2>Quick Searches</h2>
- Open a new tab in your internet browser and go to your PastPerfect
Online site.
- Perform a search for the first Quick Search link you would like
to include on your Landing Page. We will do a Keyword Search for "Rocky
Pine Ranch".
- Copy the URL of your search results.
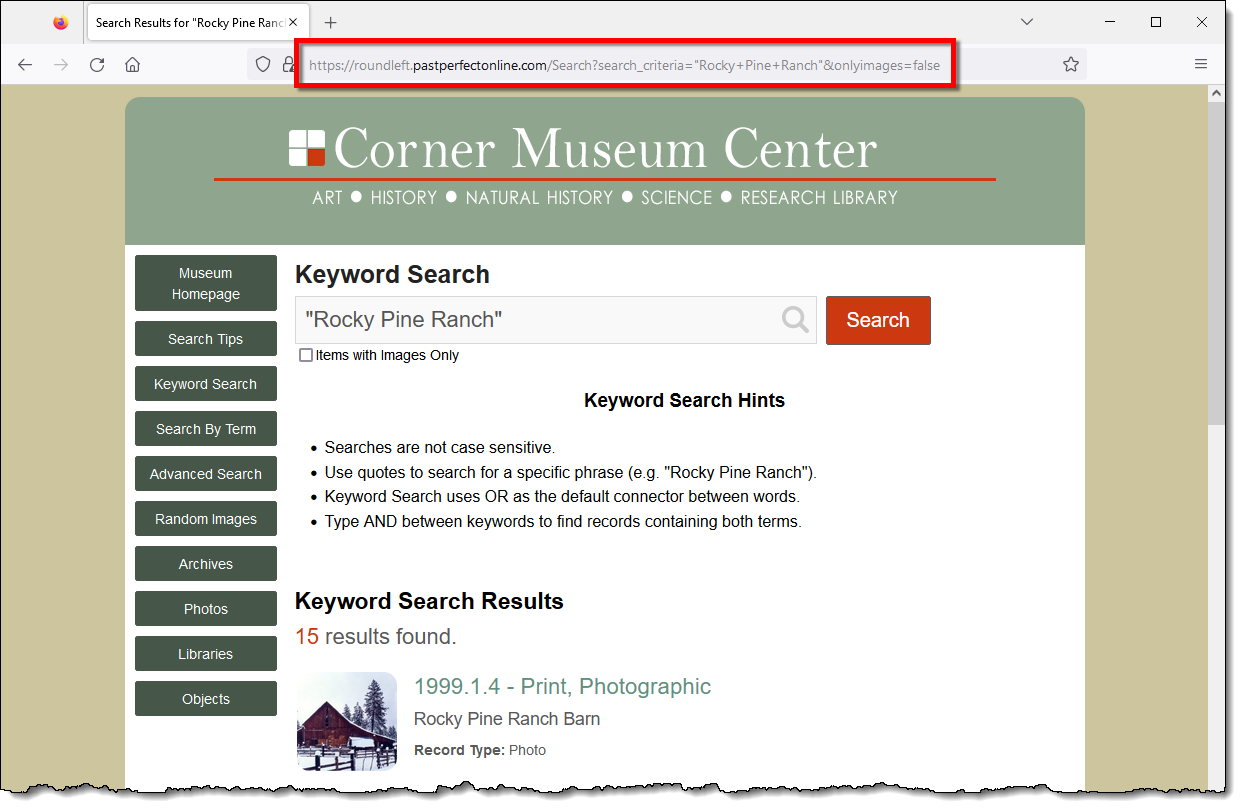
- Return to the Landing Page tab in IMS.
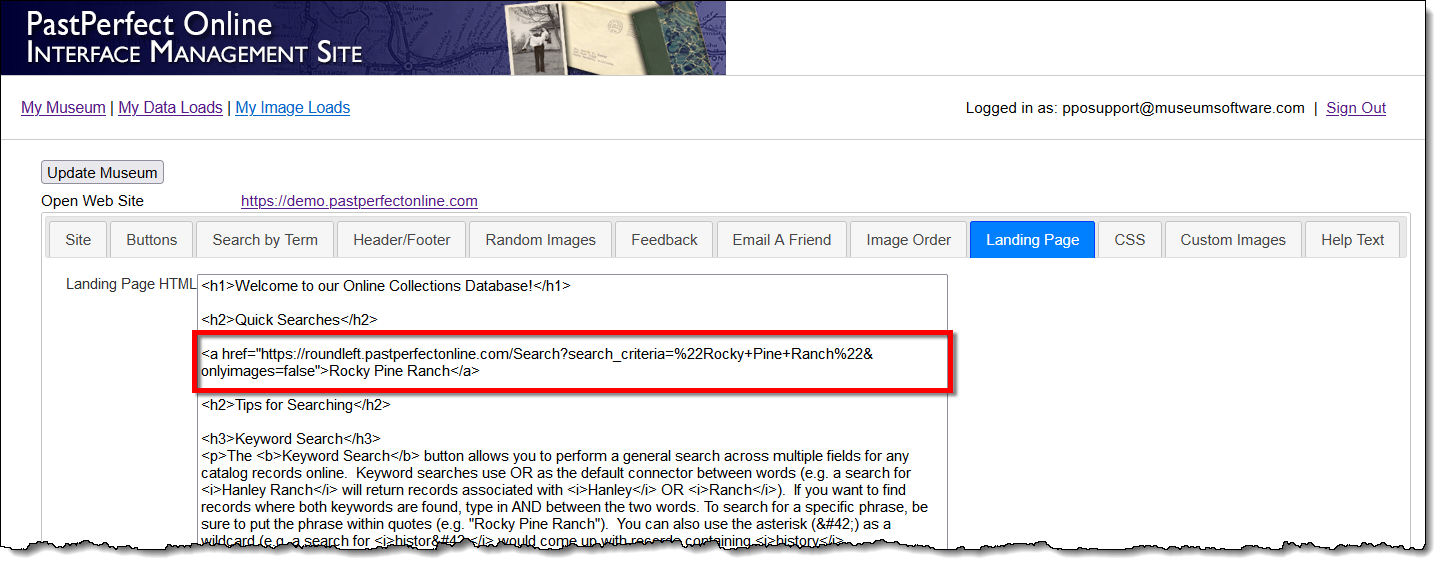
- To create a link for the Keyword Search results for "Rocky
Pine Ranch" the HTML code is as follows:
<a href="https://roundleft.pastperfectonline.com/Search?CurrentPage=1&search_criteria=%22Rocky+Pine+Ranch%22&onlyimages=false">Rocky Pine Ranch</a>
- Replace the section in italics with the URL of your search
results.
- Replace the section underlined with the word or phrase you
want to appear as your link.
- Repeat these steps for each link you want to create. You may want
to include <br> as a line break between the HTML code for each
link so that they each appear on separate lines.
- Once you have made your changes, click the Update Museum
button at the top or bottom of your page to save the changes.
- Click the Open Web Site
link at the top of your page to see the new links on your site. You
can style these links as you would any other portion of your Landing
Page.
References