Image Management
Images can be attached to catalog records, condition reports, exhibit
records, people records, site records, and contact records.
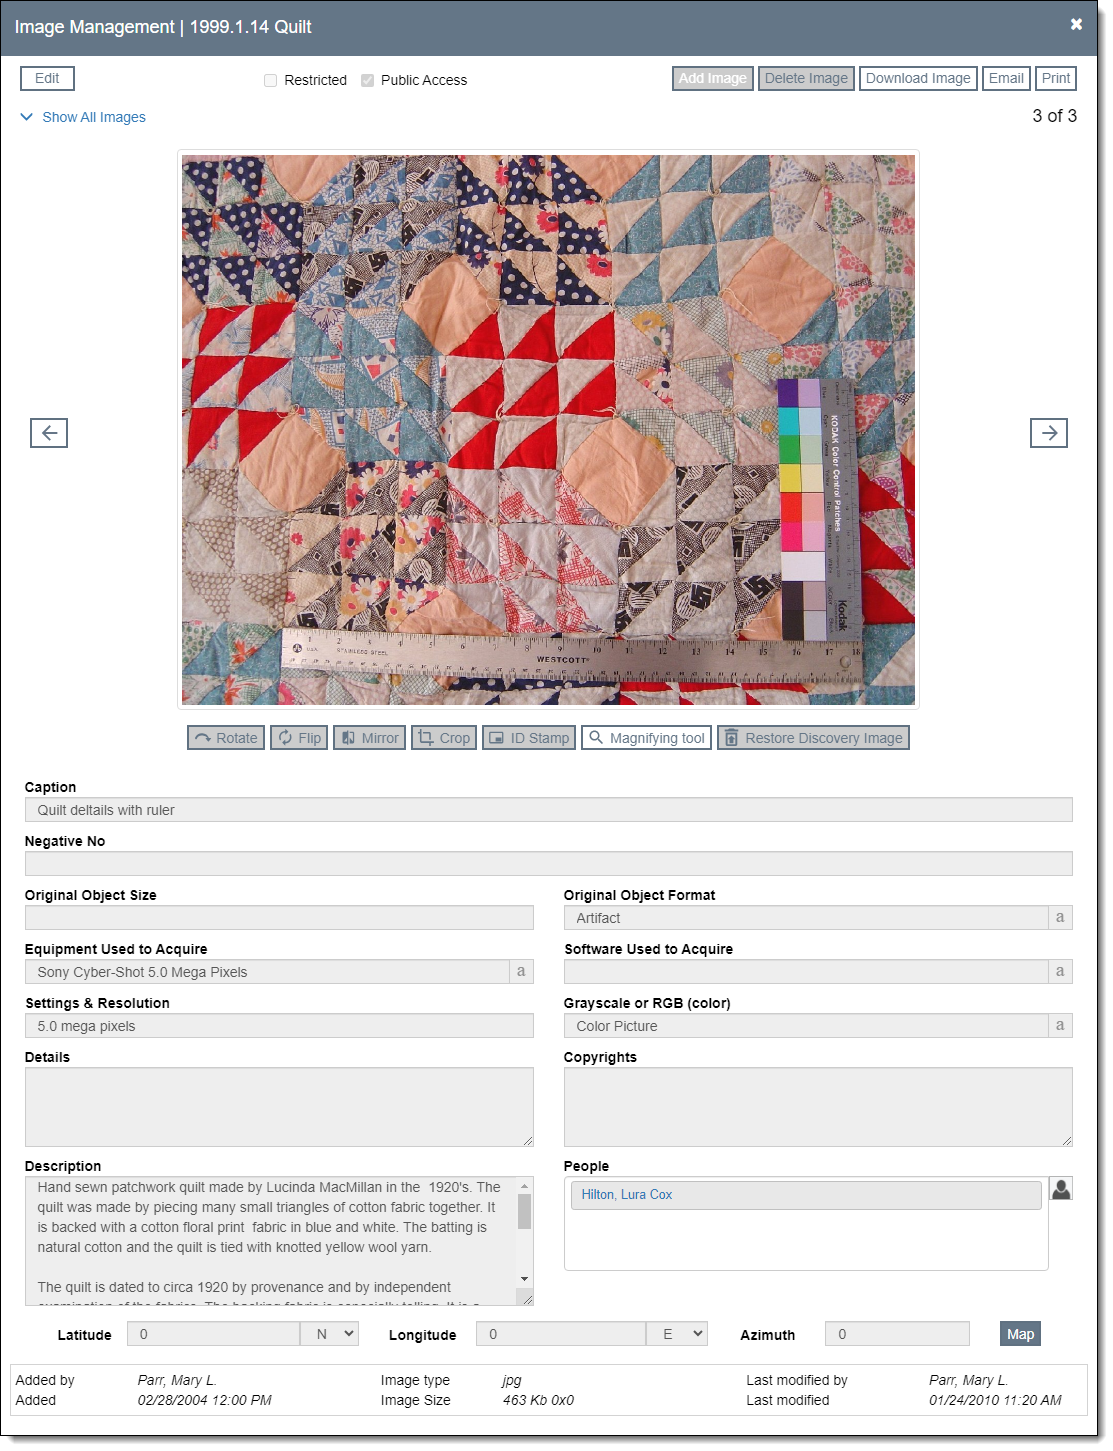
Add Image
- Click the "Image Management" button in the top right
corner of the record screen
- Click the "Edit" button
- Click the "Add Image" button
- Navigate to the image you want to attach and double click it. The
image will upload and then display on the Image Management screen.
- If desired, make modifications to the image using the Action buttons
below the image:
- Rotate – rotates the image 90 degrees clockwise. Click the
button multiple times to continue to rotate the image.
- Flip – flips the image from top to bottom creating an upside
down and reversed image.
- Mirror – reverses the image left to right creating a backwards
reversed image.
- Crop – allows you to draw a box with your mouse to select the
area to retain. After clicking "Crop," click and drag
your mouse around the area of the image you want to keep. Then
click "Apply Crop" and "Yes" to confirm.
- ID Stamp – applies the Object ID as a watermark on the image.
You can choose the location, size, and color of the stamp
and add a drop shadow if desired.
- Fill out the metadata fields at the bottom
- Click "Save" in the top left corner
Other Image Management Functions
- Delete Image – removes
the image permanently
- Download Image – opens
the full size image in a new tab
- Email – allows you to send
the image through email
- Print – allows you to print
a report of the image record or save as PDF
- Show/Hide All Images –
displays/hides thumbnails of all images attached to the record. Click
and drag images to change their order.
- Left/Right arrow – navigate
between images attached to the record
- Magnifying tool – allows
you to view portions of the image in closer detail
- Restore Discovery Image
– restores the image back to its original state when it was attached
- Map – opens the location
in Google Maps if the Latitude and Longitude metadata fields are populated