Query screens are the main access point for all records in your system. Query screens are similar in appearance and functionality across all program areas. From a Query Screen, you can view subsets of your data and then access specific records.
Query screens have several common areas: Left Sidebar (including Views and Last Modified Records), Browse Grid, Simple Search Box, Filter Section, Options Section, and Action Buttons. Depending on which query screen you are viewing, you may see some of these sections and buttons but not others. For more specific details, see Collections Query Screens and Development Query Screens.
This section provides more specific access points to your records.
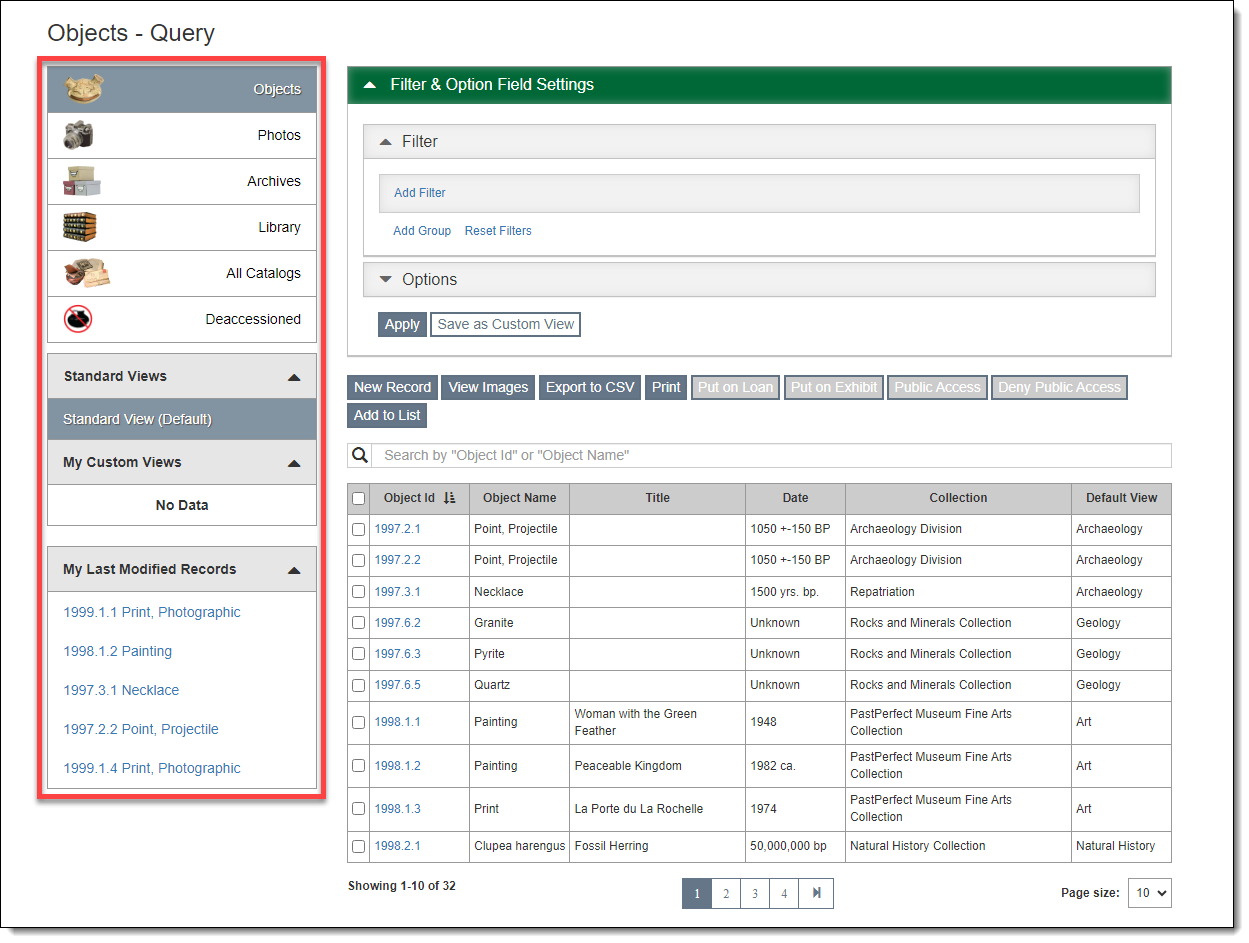
The top portion of the sidebar allows you to easily view subsets of your data based on record type or record status depending on the specific Query screen you are viewing.
The Standard View includes all records of the type specified in the Left Sidebar and a set of default fields. After you have run a query or changed the view, you can click Standard View to return to these default settings. The Standard View cannot be edited, renamed, or deleted.
My Custom Views allows you to set up and save filter statements and/or option field selections that change what records and data appear in the Browse Grid. Each user login can create and save their own custom views. If you hover your mouse over the view name, you can edit the name or delete the view. Users also have the option to set a custom view as their default view when accessing the selected Query screen. Please note, you cannot delete a custom view if you are currently displaying that view or it is set as the default view. For more information, see Collections - Creating Custom Views and Development – Creating Custom Views.
My Last Modified Records lists the records recently modified in this area by your user login. Click the hyperlink to access the record directly.
The Browse Grid lists records based on the selected view. When you first come to a Query Screen, the list of records displayed will be based on the selected default view. You may narrow down the records visible by using the Filter Section. The fields you see and the sort order are controlled by the Options section.
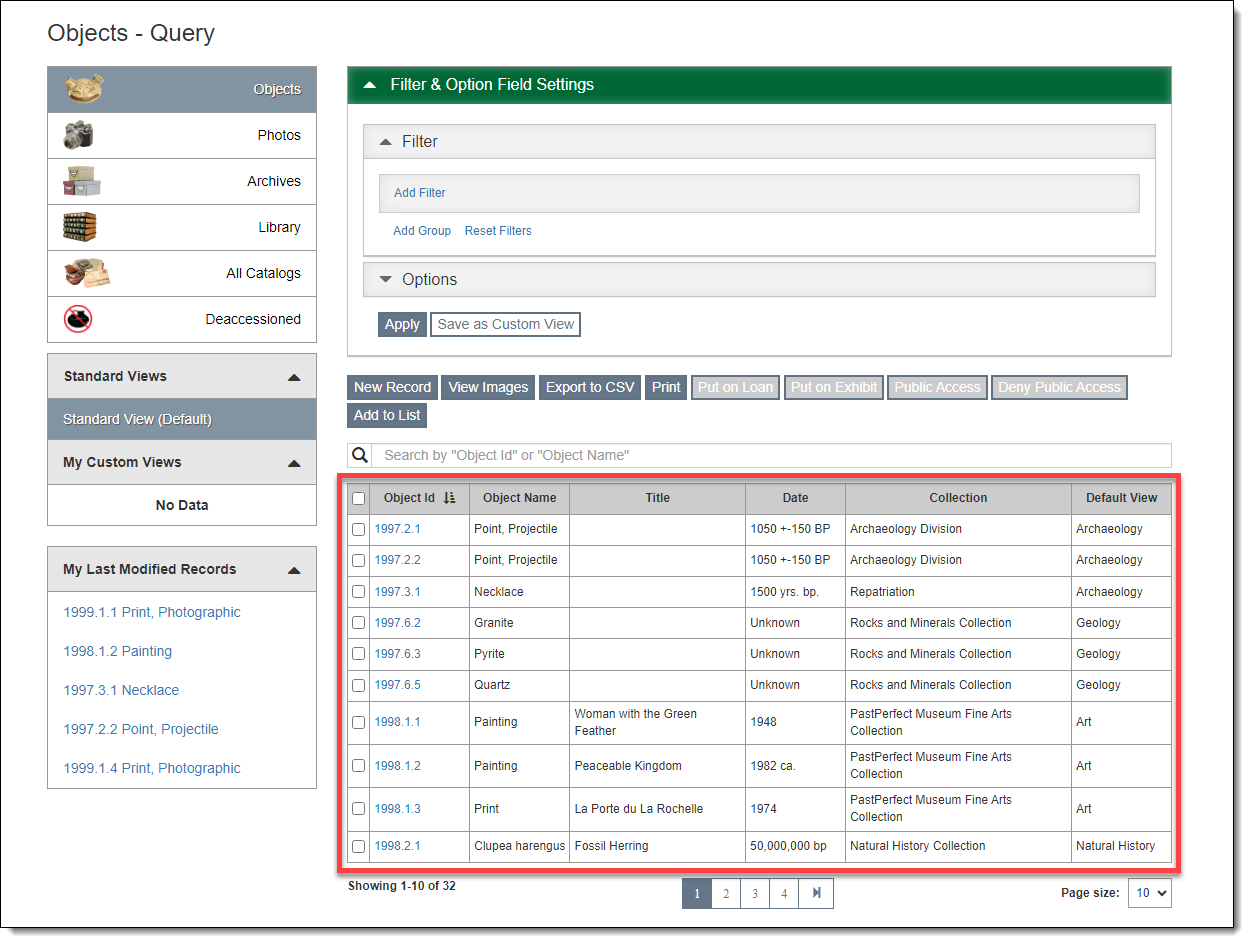
To view a full record, click on the hyperlinked field.
To perform a quick sort, click on a column header. If you click the column header a second time, the table will sort by that field in descending order.
To change the number of records you see on this screen, change the "Page size" option at the bottom of the screen.
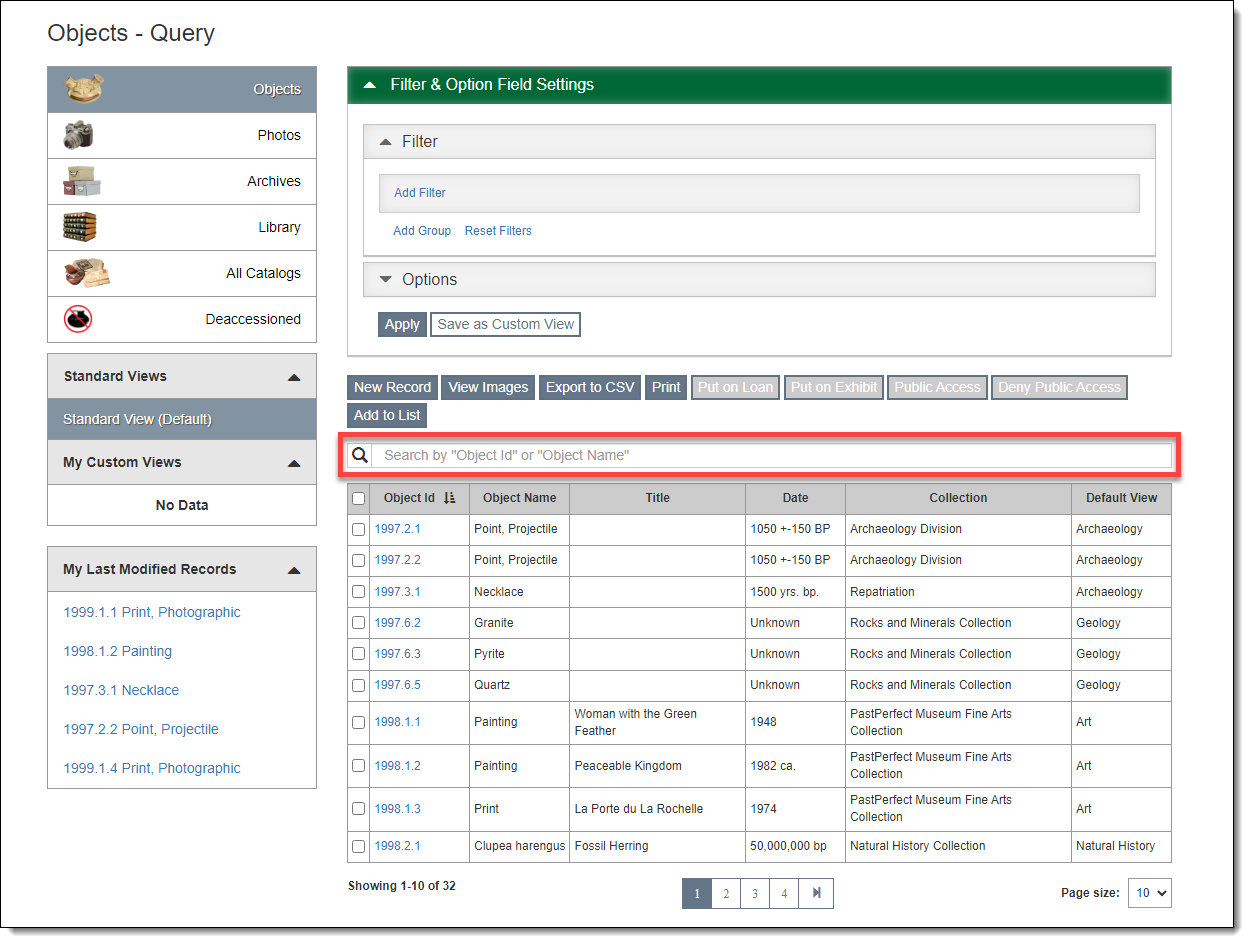
This search box is located directly above the Browse Grid below the Action Buttons. It is designed to search only a few identifying fields based on the record type. The searched fields are displayed in the search box before you enter any text. Type the data you want to search for, and the search will begin immediately. The resulting records will display in the Browse Grid.
The Filter & Option Field Settings section allows you to change what records and fields appear in the Browse Grid. In Catalogs and Contacts, the fields available for Filters and Options can be selected in the Settings menu. For more information, see Settings - Catalog Filter & Option Fields and Settings - Contact Filter & Option Fields.
Filtering the list of records and changing what fields appear in the Browse Grid allows you to target the records and fields to include when printing reports and exporting to CSV. Additional actions can be performed on the resulting records depend on the Query screen. These settings can also be saved as Custom Views, which are a quick way to see saved subsets of your records without having to change the Filter and Options on the Query screen each time.
This section allows you to narrow the list of records appearing in the Browse Grid. Once a filter is applied, the resulting records will appear in the Browse Grid and will be included when printing reports and exporting to CSV. Depending on the Query screen, there are additional actions that can be performed on your results.
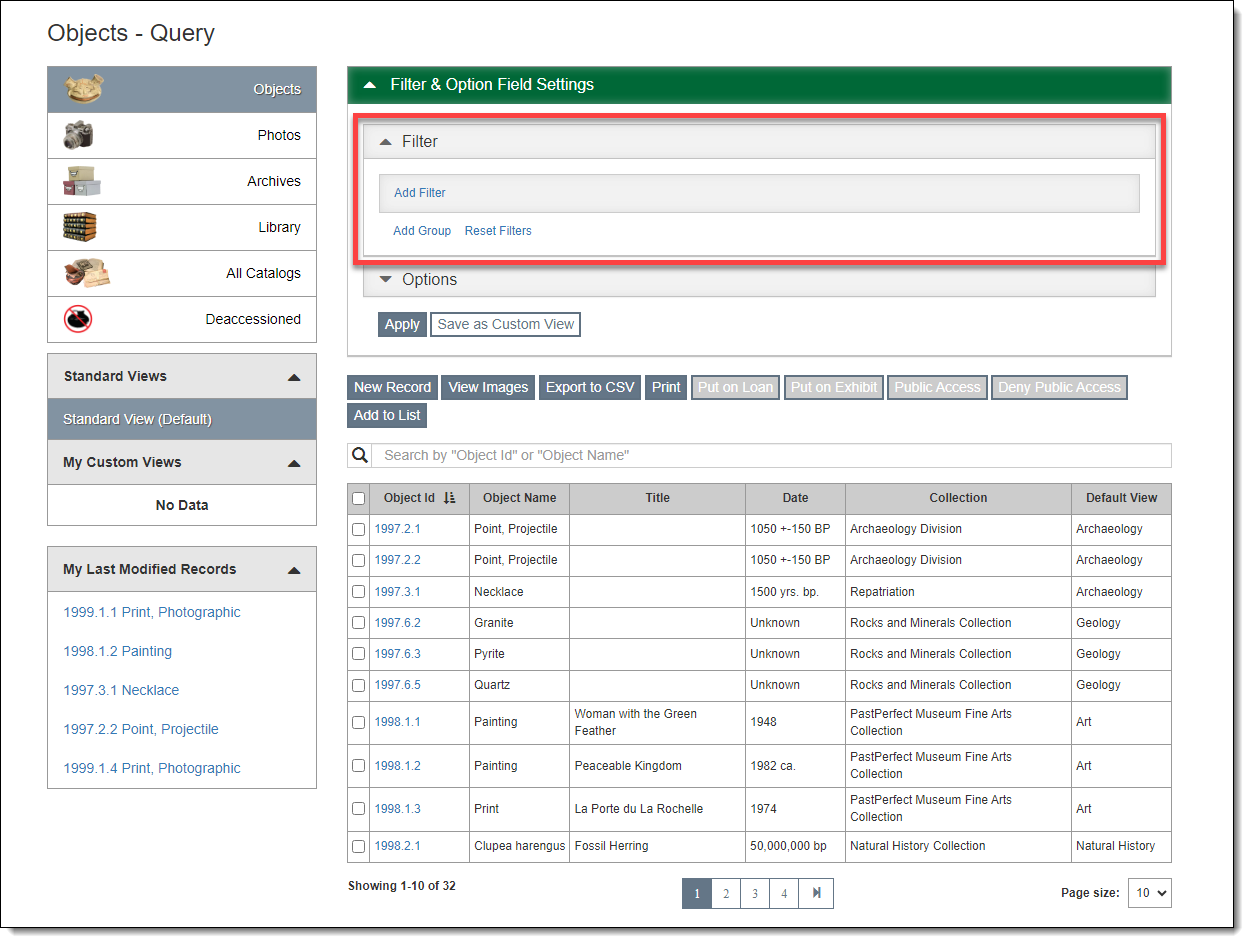
By default the Filter section is expanded when you go to a Query screen.

To add a filter, click "Add Filter." Use the first drop-down list to choose a field to filter on. Use the second drop-down list to choose your condition. If necessary, use the field on the right to select from the field's authority file (if available) or enter the text or value you are looking for. Multiple filters can be joined by AND or OR.
To remove a filter, click the "X" button to the right of the filter.
Once your filters are created, click the "Apply" button to view the records that meet your criteria.
If you want to go back to browsing all records, click "Standard View".
For more information, see Collections - Working with Filters and Development - Working with Filters.
This section allows you to set the fields you see in the Browse Grid. Once you select option fields to include and apply your changes, the fields will appear in the Browse Grid and will be included when printing reports from the Query screen.
In Catalogs, Accessions, Contacts, and Pledges & Receipts, the selected option fields are included when exporting to CSV from the Query screen.
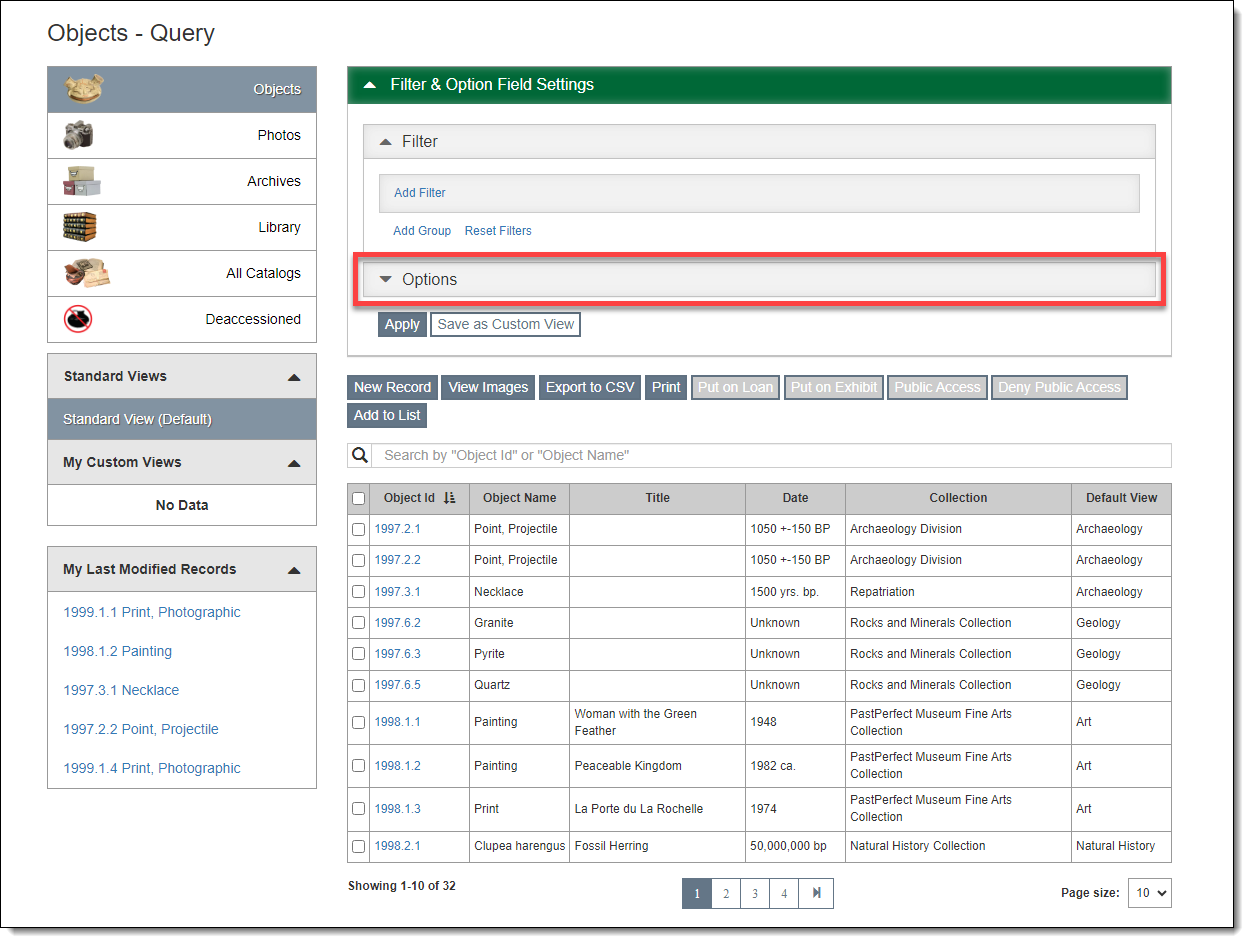
To access the Options section, click the down-arrow next to Options to expand the accordion.
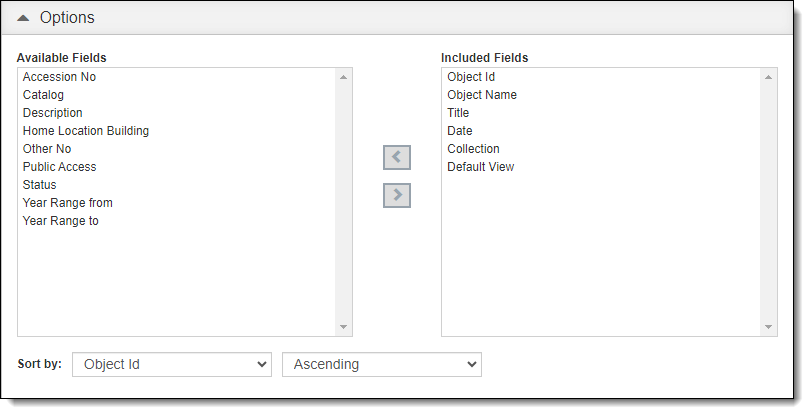
To include a field in the Browse Grid, select the field in the Available Fields list on the left. Then click the right arrow to move it to the Included Fields list on the right.
To remove a field in the Browse Grid, select the field in the list on the right. Then click the left arrow to move it to the list on the left. The first field listed in Included Fields is always required because it links to the individual record and cannot be removed.
To change the order of the fields in the Browse Grid, select a field in the Included Fields list on the right and drag it up or down to the desired position.
To set a sort order for the Browse Grid, first be sure the field on which you want to sort appears in the list on the right. Then choose it in the drop-down list labeled "Sort by." You may also select "Ascending" (alpha A-Z or numeric 1-10) or "Descending" (alpha Z-A or numeric 10-1).
Once you have made your selections, click "Apply." If you are happy with the results, you may save this view (including the filters) to use again later by clicking "Save as Custom View." The view name will appear under "My Custom Views" in the Left Sidebar. Custom views are specific to your user account.
For more information about Custom Views, see Collections - Creating Custom Views and Development – Creating Custom Views.
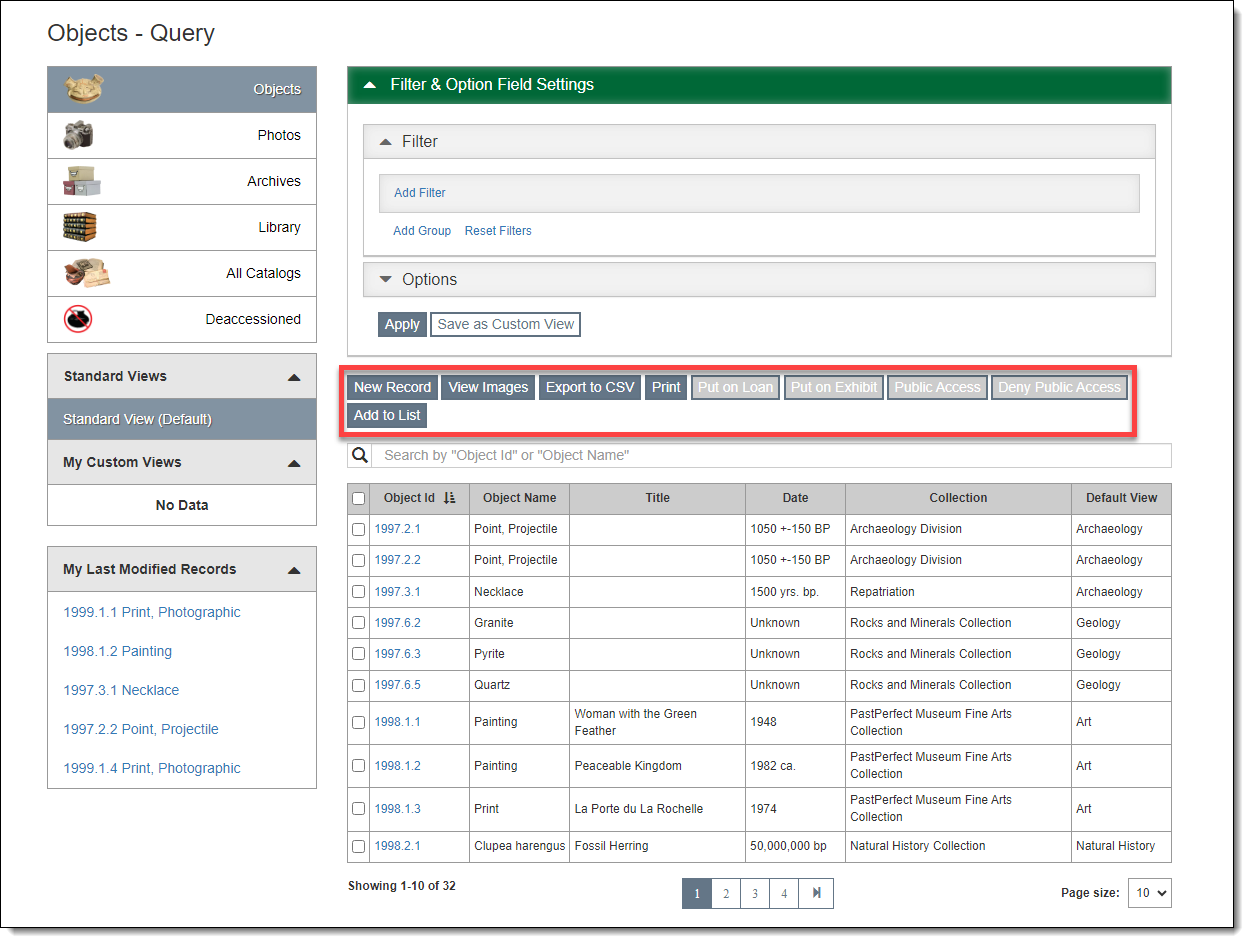
The Action Buttons are located in the middle of the Query screen, right above the Simple Search Box. There are buttons for adding new records, printing reports, and exporting the data to CSV. Other buttons may also be available depending on which Query screen you are viewing. See Collections - Query Screens and Development - Query Screens for more specific information.