Research
Research is where all the hard work of cataloging pays off. Research allows you to develop insights and draw conclusions about your collections. PastPerfect can sort and organize your data in new and unexpected ways. If your catalog records have been entered carefully and consistently, you will enjoy performing searches of the collections.
Using the Research section on the Main Menu, you can access Catalog Lists, create queries using fields common to all four catalogs (Object, Photos, Archives, Library), and search by Keyword, by Lexicon, by People and by Search Term. You can also research records within each catalog by using the Query function in the Navigation Bar at the top of the Objects, Photos, Archives and Library screens.
Research Options on Main Menu
Once a catalog record or group of records is located through a search, you can view the catalog screens for each item, look at thumbnails of each item in a light box format, and print summaries, catalog cards, exhibit labels and detailed reports. There are also tools to export the results to MS-Excel and put the items on a Catalog List.
Catalog Lists
Through Research, you can take advantage of one of PastPerfect's powerful tools to use your collections data. Catalog Lists enables you to create artifact lists, then perform actions on all of the lists' items. For instance, you can put all list items on outgoing loan or exhibit, or change their locations. Catalog Lists allows you to manage lists through folders, make lists public or private, and lock lists so they may not be changed. You can add items to lists right from the Catalog Lists section or use any of the other five research options. Please see Chapter 15 - Catalog Lists for detailed instructions on creating and managing lists.
Research All Catalogs
This section allows you to search all four catalogs at once using the fields common to all of the catalogs -Objects, Archives, Photos, and Library.
Search All Catalogs screen
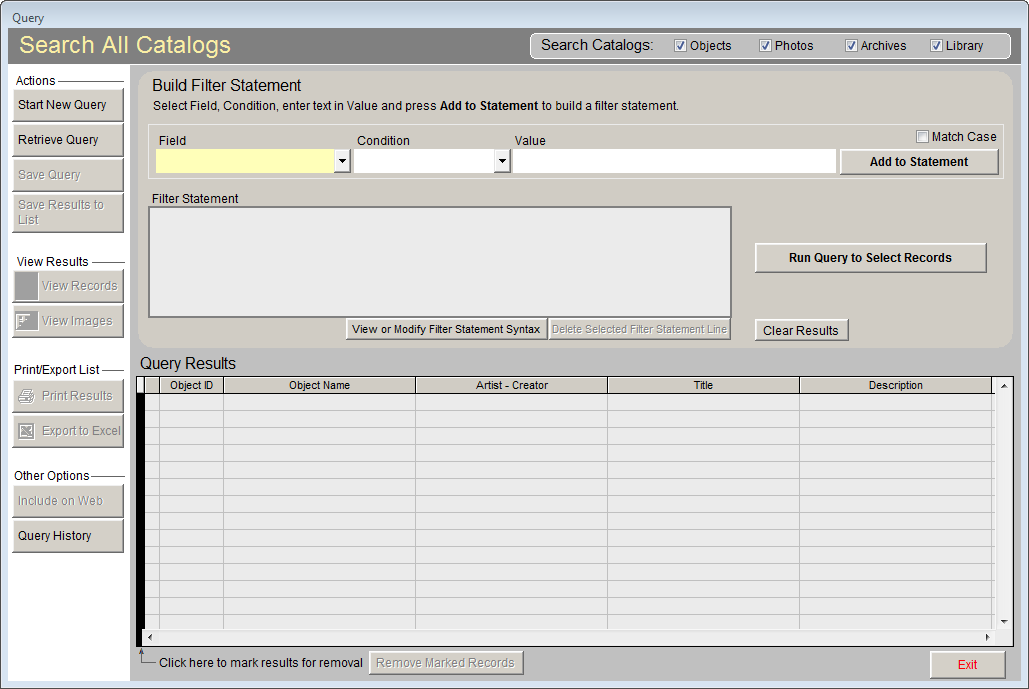
To begin a search, click All 4 Catalogs in the Research section of the Main Menu. The Search All Catalogs screen will appear.
If you decide to limit your search by catalog, you can deselect catalogs by unchecking the boxes in the Search Catalogs section at the upper right of your screen. Only records from the checked catalogs will be included in your query results.
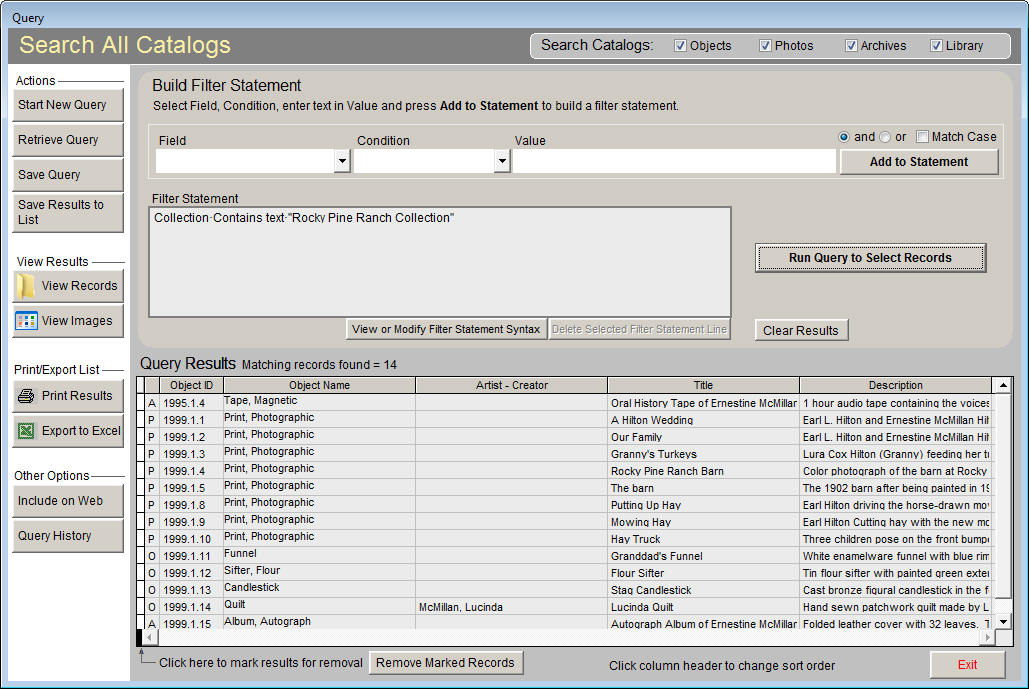
The Search All Catalogs screen enables you to build a filter statement from field and condition drop-down menus and using "and" and "or" operators to either narrow or expand the search.
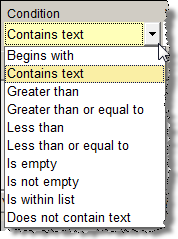
To begin, choose one of the common catalog fields from the Fields drop-down menu. Then use the Condition drop-down list to pick "Begins with," "Contains text," "Greater than," "Greater than or equal to," "Less than," "Less than or equal to," "Is empty," "Is not empty," "Is within list," or "Does not contain text" to start the filter statement.
TIP: You may choose the fields that are available in the Field drop-down menu by going to the Main Menu | Setup | Query Fields section.
Field and Condition Drop-down Menus
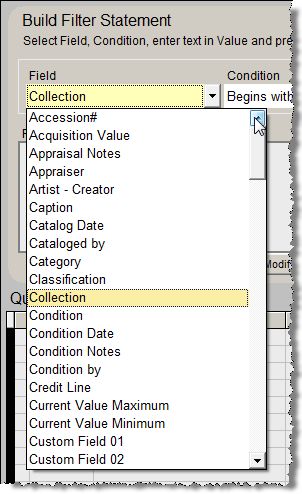
Select a field to search from the drop-down menu.
In the Value box to the right of Condition, enter the word or words (or dates, numbers, etc.) you want to find; capitalization is not important unless you check the Match Case box at the top right of the screen. Depending on the field being searched, you can access the authority file for that field. Please note the authority file icon in the upper right corner, which appears as a blue book with a prominent lower case "a" in front of it. You may right click in the value field or press F7 on your keyboard to access the authority file.
Click on the Add to Statement button to add this filter statement to the query. If this filter is sufficient to find the data you need, click Run Query to Select Records.
In the example shown below, we searched the common field Collection for records that contain text "Rocky Pine Ranch Collection." The results were eight photographs, four objects, and two archival records.
Query Results showing filter statement
If additional conditions must be met to find the records you seek, do not run the query yet. Go back to the Field drop-down menu to select another field, choose a Condition from the drop-down list, and enter a Value. Now you must select an operator to connect both lines in the filter statement, either "and" or "or." Make your selection by clicking the radio button next to the appropriate option above the Add to Statement button. If you select "and," both conditions must be met for a record to appear in the results. If "or" is chosen, your results will contain records that meet either condition.
Once you have the field, condition, value and operator in place, click Add to Statement. Continue adding statements and choosing operators as needed. If you wish to remove a line of your filter statement, click on that line, then click the Delete Selected Filter Statement Line button, directly underneath the filter statements. When you have the entire filter statement created that will narrow the search, click Run Query to Select Records. If matching records are located, a list is displayed in a grid in the lower part of the screen. If you decide to remove any records from the list, they may be marked for deletion by clicking in the far left column, then deleted from the list by using the Remove Marked Records From List button. This action only removes the items from search results. It does not delete records from the catalogs.
TIP: You may choose the fields that display in the Query Results by going to the Main Menu | Setup | Query Fields | Change Query Results Field List.
Viewing, Printing and Acting on Search Results
The Sidebar on the left has tools for saving, viewing, and printing your search results. You have many of these same tools for all search options. Below you will find explanations for how to perform these actions, whichever research option you choose.
In the All 4 Catalogs Actions section, you can start a new query or save and retrieve queries. You can also put the search results from all research tools on a Catalog List.
Start New Query - Click this button if you wish to start a new query and leave the current query. If you want to go back to a query and reuse it, please be sure to save that query before clicking Start New Query.
Retrieve Query - This option enables you to select a previously saved query from the list or the last performed query, seen below. Once a query has been retrieved, you may run it as is or modify it and then run it.
Retrieve Saved Query

Save Query - Clicking the Save Query button allows you to save a query for later retrieval. The filter statement is saved so you can rerun the query. You will be asked to give the query a name by which it will appear on the list of all catalog queries.
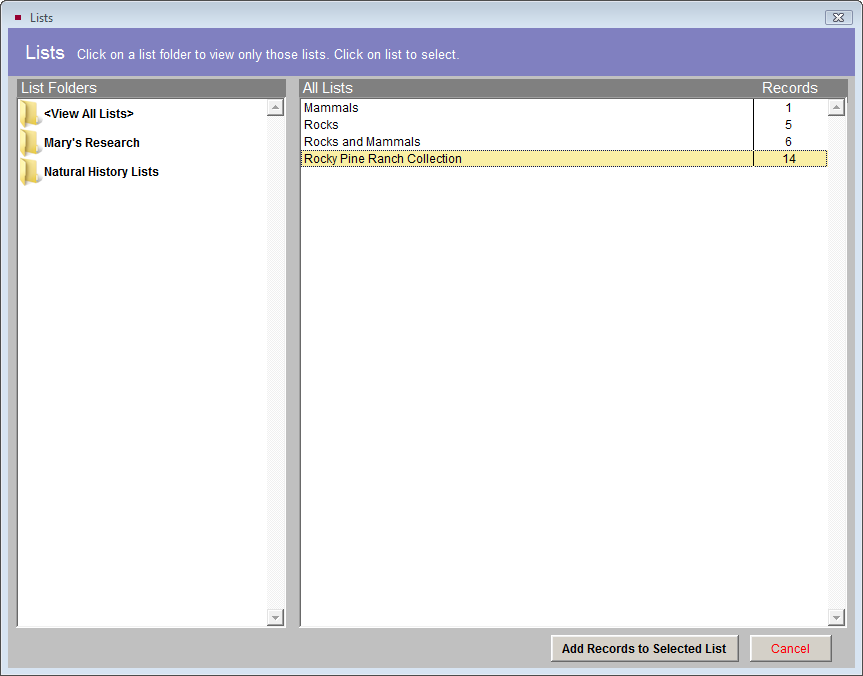
Save Results to List - You can add your search results to an existing Catalog List. Please use the Catalog List Manager to first create the list. Then perform a search from one of the Research options, and choose the Action Save Results to List. Choose the list to which you wish to add your query results, then click Add Selected Records to List. You will be prompted with the number of records that will be added to the list. If a record in your query results is already on the list, it will remain on that list.
Save Search Results to a List
In the View Results section of the Sidebar, you can view the search results as full catalog records or in a light box format.
View Records - Use this button to view the catalog screens for each record in the search results. Most functions are available on the catalog screens, including displaying source information, editing data and attaching images. To return to the search, click the Exit button in one of the displayed catalog records.
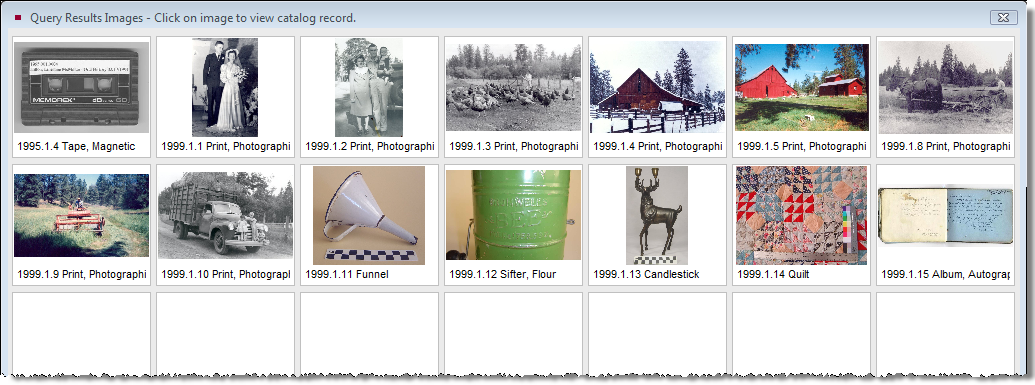
View Images - The View Images option enables you to see an image thumbnail for each record in a light box format. If you wish to view the catalog record from the light box, click once on the thumbnail image. The View Image option is available when the MultiMedia Upgrade has been installed.
View Images of Query Results
The Print/Export List section has options for printing reports and exporting your results to MS-Excel.
Click Print Results to see the Print Common Records screen.
Print Common Records screen
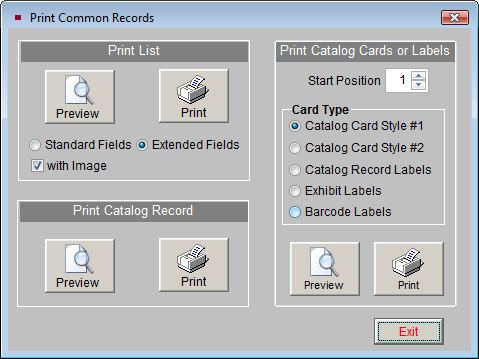
Print List - You can preview or print a list of all records that are in your search results. The list is either the Standard Fields or Extended Fields. The standard fields include Catalog, Object ID, Object Name, Description, Condition, Status, and Home Location. If you have attached digital images to the records using the optional MultiMedia Upgrade and wish to see thumbnail images on the report, check the "with Image" box. Please note that the Search Results Print List and Print Extended List are different reports when you include images.
Print Catalog Record - Prints the full catalog record of each of your search results, one record per page.
Print Catalog Cards or Labels - Allows you to print catalog cards, catalog record labels, exhibit labels, and barcode labels. Printing barcode labels is available when you have purchased and installed the Barcode Printing or Inventory Manager Upgrades.
The Export to Excel button in the Sidebar creates an Excel spreadsheet from the query results. Please specify an Export File Name and whether you wish to export the Standard Fields or Extended Fields. Standard fields include: Catalog, Object ID, Object Name, Description, Condition, Status, Home Location, and Imagefile Name, plus any other fields you have chosen to add to your All Catalogs Query Results Field List. Please see the tip later in this chapter for more information on how to change the Query Results Field List. If you choose to export Extended fields, the Excel file will contain all of the visible fields from your catalog records.
Export Query Results or List to Excel
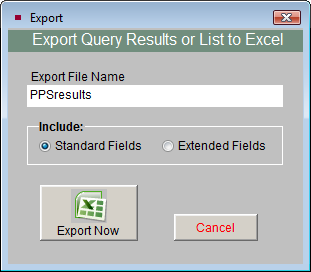
The file will open in HTML using your computer's MS-Excel. The file is saved in HTML (.htm) format and stored in the PP5Reports folder on your Local Disk drive (usually C). If you wish to save it as an XLS file, go to the Save As function in the Excel File menu and choose "Microsoft Office Excel Workbook" as the file type.
In the Other Options section of the Sidebar, you can include the query results records in a Web export to a PastPerfectOnline website and view a query history.
Include on Web - This option is available if you have purchased the PastPerfect Online program. It enables you to add items in your query results to your PastPerfect Online site. All items in the results list will be included the next time you publish your data to the Web. For more information about PastPerfect Online, visit our website at https://www.museumsoftware.com.
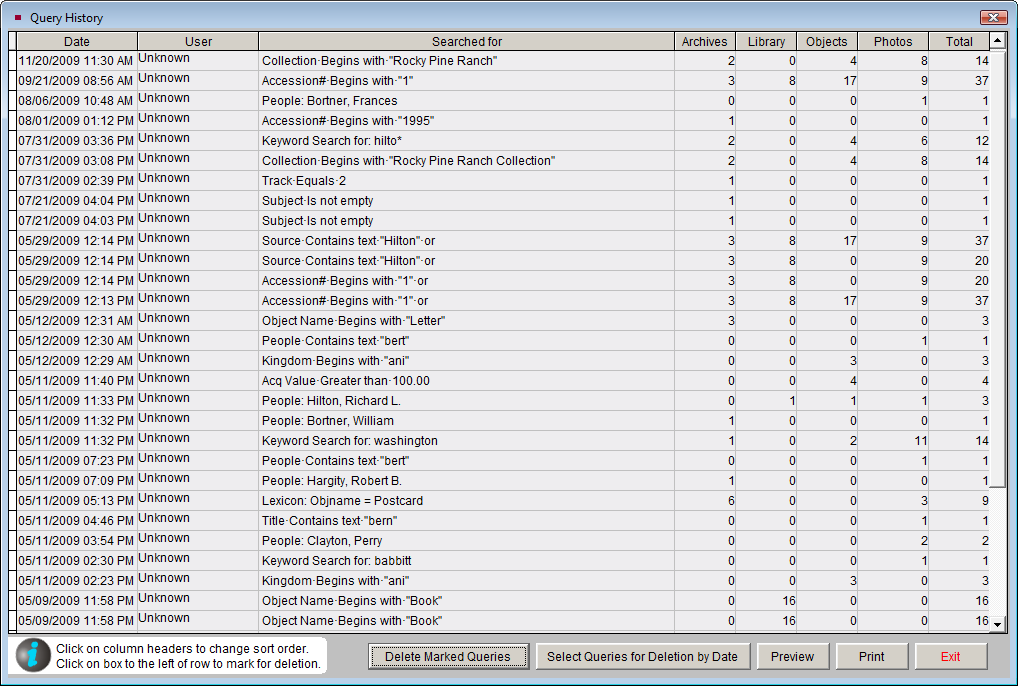
Query History - This option gives you a list of the queries by date, user, what was searched for and numbers of records found in each catalog. If you have Security set up and activated with user names, you can see who has performed which queries. The list of queries may be previewed and printed.
If you do not wish to keep a complete list, you can mark queries for deletion and click Delete Marked Queries. You may also select queries to be deleted by date, by clicking the Select Queries for Deletion by Date button. You may enter a date, and queries older than that date will be deleted.
Query History screen
Additional helpful tools:
Remove Marked Records - Before you view, print, export or perform other actions on these query results, you can manually remove selected records from the results grid by clicking in far left column of the record to mark it. Then click Remove Marked Records.
Clear Results - Clears the search results, but leaves the existing filter statement. You can then add to or modify the filter statement and rerun the query.